Steps for Clicface Trombi Free version
- Follow these steps to install Clicface Trombi plugin: (free version)
- In the WordPress admin panel, go to Plugins > Add New
- Under Search, type in the name of the WordPress Plugin : clicface trombi
- Click Install Now, then Proceed
- If successful, click Activate Plugin to activate it
Steps for Clicface Trombi Standard / Pro / Ultimate versions
- Follow these steps to install Clicface Trombi plugin: (Standard, Pro or Ultimate version)
- In the WordPress admin panel, go to Plugins > Add New
- Click on Upload
- Select the zip file you have received by email after your order and click Install Now
- If successful, click Activate Plugin to activate it
Then, you can begin to add Divisions, Worksites and Employees in the directory under the Employees tab. For more information about how to use Clicface Trombi, check the documentation.
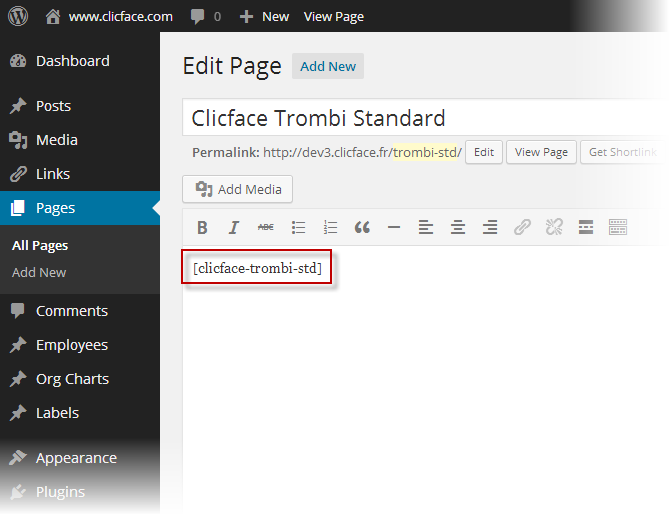
- Inside the article or page you want, insert the code below in the HTML tab. The directory will appear:
- For the Free version : [clicface-trombi]
- For the Standard version : [clicface-trombi-std]
- For the Pro version : [clicface-trombi-pro]