If you need to import many employees in Clicface Trombi, the Importer Plugin is the right solution. Instead of creating the employee record one by one, you can import a CSV file, and all the employee records will be created in one step.
In this page, you will find information about how to create the CSV file, and how to import it. Click here to buy the Importer Plugin.
Creating the CSV file
A CSV file stores data in plain-text form. Each field is separated by a comma or a semi-colon. You create it with any Excel or Excel-like software, by saving the file as a CSV file.
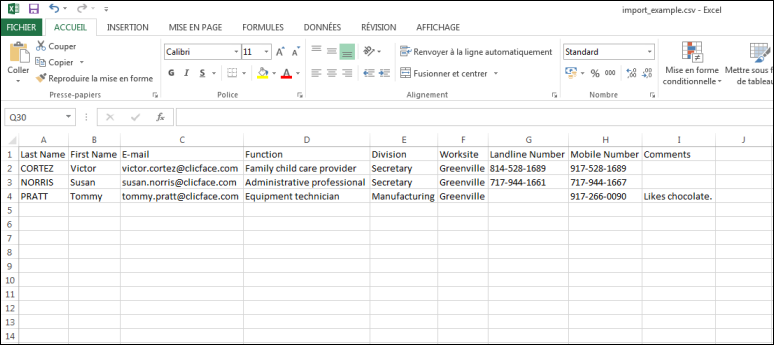
- The file to be imported must have these fields:
- Last Name
- First Name
- Function
- Division
- Worksite
- Landline Number
- Mobile Number
- Comments
Each row must match to a contact. It should look like this:
- To help you to create the CSV file, we have prepared template files:
- CSV template file with comma separator (the most common case, for English Speaking Countries): click here to download
- CSV template file with semicolon separator (for other specific countries, such as France): click here to download
In any case, it’s possible to import a CSV file with a comma or semicolon separator. Pictures cannot be imported from the CSV file ; you will have to upload them separately.
Importing the CSV file
Once your CSV file is ready, the next step is to use the Importer Plugin ; the plugin will read your CSV file and create the contacts in Clicface Trombi.
After the activation of the Importer Plugin, you will find a new item under the Employees menu in your WordPress admin dashboard:
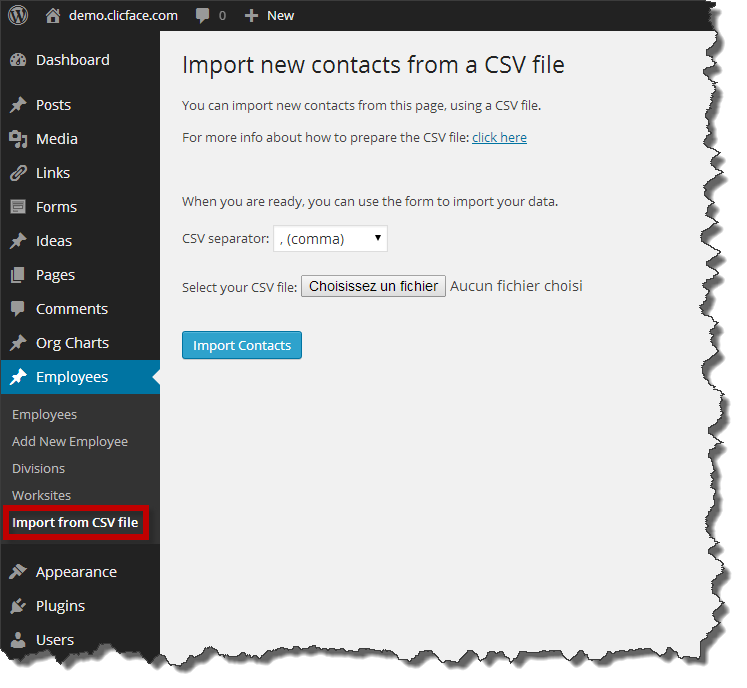
Then, you have to select the right separator of your CSV file (comma or semicolon) and to browse the file. By clicking on Import Contacts, your file will be processed and the new contacts will be created.